Photobucket Photobucket photobucket
Showing posts with label Literacy Stations. Show all posts

Tuesday, April 9, 2013

Science Fair Fun

In my class we've been studying weather.  Last week, we made water cycle bracelets.  My kiddos said I was the best teacher ever!  {They're so easy!}

Water Cycle Bracelet Materials {per child}:
1 white pipe cleaner
1 yellow bead
1 clear bead
1 white bead
1 blue bead
1 green bead

On my Smart Board I displayed an image of the water cycle with each step labeled.  I used the Whimsical Weather unit from A Cupcake for the Teacher.  As we discussed each process of the water cycle we added the appropriate bead to our pipe cleaner.  To finish, I rushed around and twisted the ends of the pipe cleaner to make a bracelet.  It's a good hands-on visual for the little ones.

This week we watched the water cycle video on Brain Pop Jr. and checked out all of the information on our science fair display.  {Again, I used elements from the Whimsical Weather unit.}  We also completed our rain in a cup experiment.


Rain in a Cup Materials {per group}:
1 clear plastic cup
water
Barbasol shaving cream
food coloring
straw
*In my test experiment at home I first used a Dollar Tree brand shaving cream... let's just say it didn't work so well.  The Barbasol brand worked much better.

Directions:  Add water to each cup {about 3/4 full}.  Next, add shaving cream to the top.  {To help move the process along, use a straw to make a thin spot in the shaving cream.}  Last, add food coloring to the shaving cream.  Within a few minutes, the food coloring will break through from the shaving cream and fall into the water.  {Like when clouds get so heavy they have to release the weight as rain.}

Our weather study experiment will be on display at our school's science night.  Along with all of the displays from other classes, there will be hands-on science activities for the students to do with their families.  It should be a fun night!

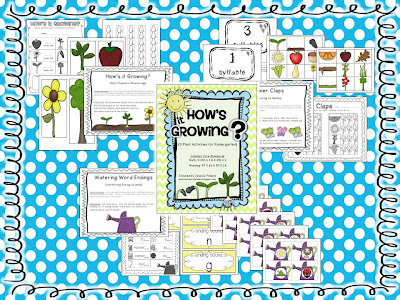
Next up, plants!  Here is my latest little kindergarten unit available in my TPT store.

Tomorrow I get to attend a professional development with Dr. Jean!  So excited!  :)


Saturday, March 17, 2012

I've been busy....

We're about to hit the beginning of the end at my school... the final nine weeks of school until my firsties become second graders!  I just love seeing them grow through the year.  During this most recent round of testing {audible sigh}, there were some struggles that stuck out to me for different kids.  So, I've spent my day making some things to help get me through the end of the school year and focus on the skills they need more practice with.  I've uploaded all of these items to my TPT and Teachers Notebook stores.  Check it out!


I also uploaded a little {freebie} to share with you all!


--Mrs. Pollard

Wednesday, March 14, 2012

How I Store My Stations

With so many amazing literacy and math stations available to teachers today I think it's very important to store them safely and in an organized way so I can always find them when I need them!  I've spent so much money on paper, ink, and laminate alone that I want to protect my investment.  {I know you're all with me on that!}

Here's how I prepare and store my stations....
First, I begin by printing all of the pages needed.  I glue the cover page on the front of a 9x12 envelope.  If the directions are seperate, I glue them onto the back of the envelope.  I laminate the envelope {with the flap open} and all of the station pieces.  I cut out the envelope and carefully slice open the opening.  Then, I cut out all of the station pieces.  I put these pieces inside of a Ziploc bag.  I put the Ziploc bag inside of the laminated envelope along with the copies of the recording sheets.  I use a small circular Velcro piece to keep the envelope closed.*


Right now I have all of these beautiful envelopes stored in a cupboard in my classroom.  The problem is that the shelves are narrow so I can't quickly locate a station I need.  I just purchased a medium sized storage tub and plan to store the envelopes inside it standing up with tall dividers for different catergories and subjects.

This is the best way I've found to keep my stations safe and sound.  How do you store your stations?

*Please note, the 9x12 envelopes come with or without the little metal brads {the ones with brads are cheaper}.  I have put both types through the big laminator.  I hear you're not supposed to put the brads through the laminator... I've never had a problem, but this is my disclaimer!  :)

--Mrs. Pollard

Friday, February 10, 2012

Literacy Block Facelift

Ok, so in my last post I mentioned being inspired to give my literacy block a little facelift.  A week and a half ago I went to another school in my district to visit a T1 classroom.  When these kids came into this classroom they were about 5 months behind where a first grader should be.  This wonderful teacher has obviously worked extremely hard because her students seem to be right where they need to be now.  She has the amazing blessing of having 3 adults in her room-- teacher, assistant, and tutor.  Clearly, this allows her to do a rotation of 3 intensive small groups daily.  Call me crazy, but I felt determined to take this idea back to my classroom and make it work.... even if I do have 4 more kids and 1 less adult.

So, here's what I came up...
I have 3 groups of 8 {leveled homogeneously}.  I gave each group an animal name-- Lovely Lions, Marvelous Monkeys, Happy Hippos.  The students never know this, but I named my groups to match their levels {low, medium, high}.  It helps me keep it all straight in my head.  I do 4 rotations of 20 minutes each.  During this time, I see my lowest students twice and my medium and high students once each.  My assistant sees my medium students twice and my lowest and high students once each.  When a group isn't with my IA or myself they are doing independent work.  Want to know the secret to successful independent time?  I gave them a notebook to do their work in!  They think those notebooks are the best thing since sliced bread!  Not a peep from those indpendent workers!


{These are all of the sheets I am using to make
my groups and plan activities.}


In my IA's group, she does the phonemic awareness tasks from our reading basil, leads games and word sorts, and other review reading and word study activities.  All of this is led by an adult so students are on-task and corrected when not understanding.

In my group, I also do a variety of reading and word study activities with a focus on reading fluency.  We spell words on whiteboards, read leveled books, reread previous books, put together cut apart sentences, and much more.  I try to keep it really fast moving to keep interest and minimize behaviors.

My independent workers go to the tub and find their group's folder.  They are to first open the folder to look for any practice sheets or assignments I've put in the folder.  If they finish that task or there is nothing there, they move on to work in their notebooks.  On the front of the folder I have a sheet with their tasks.  Each group is similar, but slightly different based on their level.  First, create a Circle Map and write the room for ___________ {insert various tasks such as beginning and ending letter, long vowel patterns, etc}.  Next, write me a letter.  {I'll respond to their letter each day!}  When all of the other tasks are complete, they are to read quietly until it's time to change.

So far, so good.  I'm really excited that my lowest students are getting 40 minutes of direct instruction each morning.... compared to my old way of doing stations with 24 kids randomly scattered around the room getting louder and more off task as the minutes passed, making it very difficult for me to pull my reading groups.  I only have 8 kids unattended at a given time which is wonderful.  I'll keep you all posted on how it's going or any speed bumps I hit along the way.  Thanks for visiting me!  :)

--Mrs. Pollard

Wednesday, January 18, 2012

Hibernation Station & Groundhog Day Unit... plus a {freebie}

Hey y'all!  I have teamed up with my teammate Randi from Teach it with Class to make an 84 page unit about hibernation and Groundhog Day.  I am so darn excited about it!  It has loads of stuff in it-- including reading, math, and writing ideas, 4 literacy stations, 4 math stations, 2 crafts, and lots of graphic organizers and writing pages!  My kids always love doing activities about hibernating animals and learning about the silly groundhog who pops up to see his shadow.

Click {here} to check it out in my TPT store!

And now, about that {freebie} promised in the post title.... head on over to Randi's blog to check out all of her wonderful ideas and resources.  If you become a follower and leave your email in her post comments, she'll email you a 10 page groundhog freebie!  How awesome is that?  She also has tons of other freebies in her TPT store.  Check her out!

--Mrs. Pollard